How to Use Simple Transfer
Simple Transfer gives you two ways to transfer photos and videos from your iPhone or iPad to a computer. The free Desktop app is recommended for most people because it supports USB transfer, destination folders, and large batches. The web browser method is ideal for quick, one-time transfers, as it allows you to move files instantly without needing to install any software.
Both methods keep the transfer local between your devices. No iTunes and no cloud upload are required.
Install Simple Transfer on your iPhone or iPad
On your iPhone or iPad, open the App Store and search for Simple Transfer, or install it directly from the Simple Transfer App Store page.
Open the app and allow Photos access when iOS asks. For full library transfer, choose Full Access instead of Limited Access.
Connect from your computer
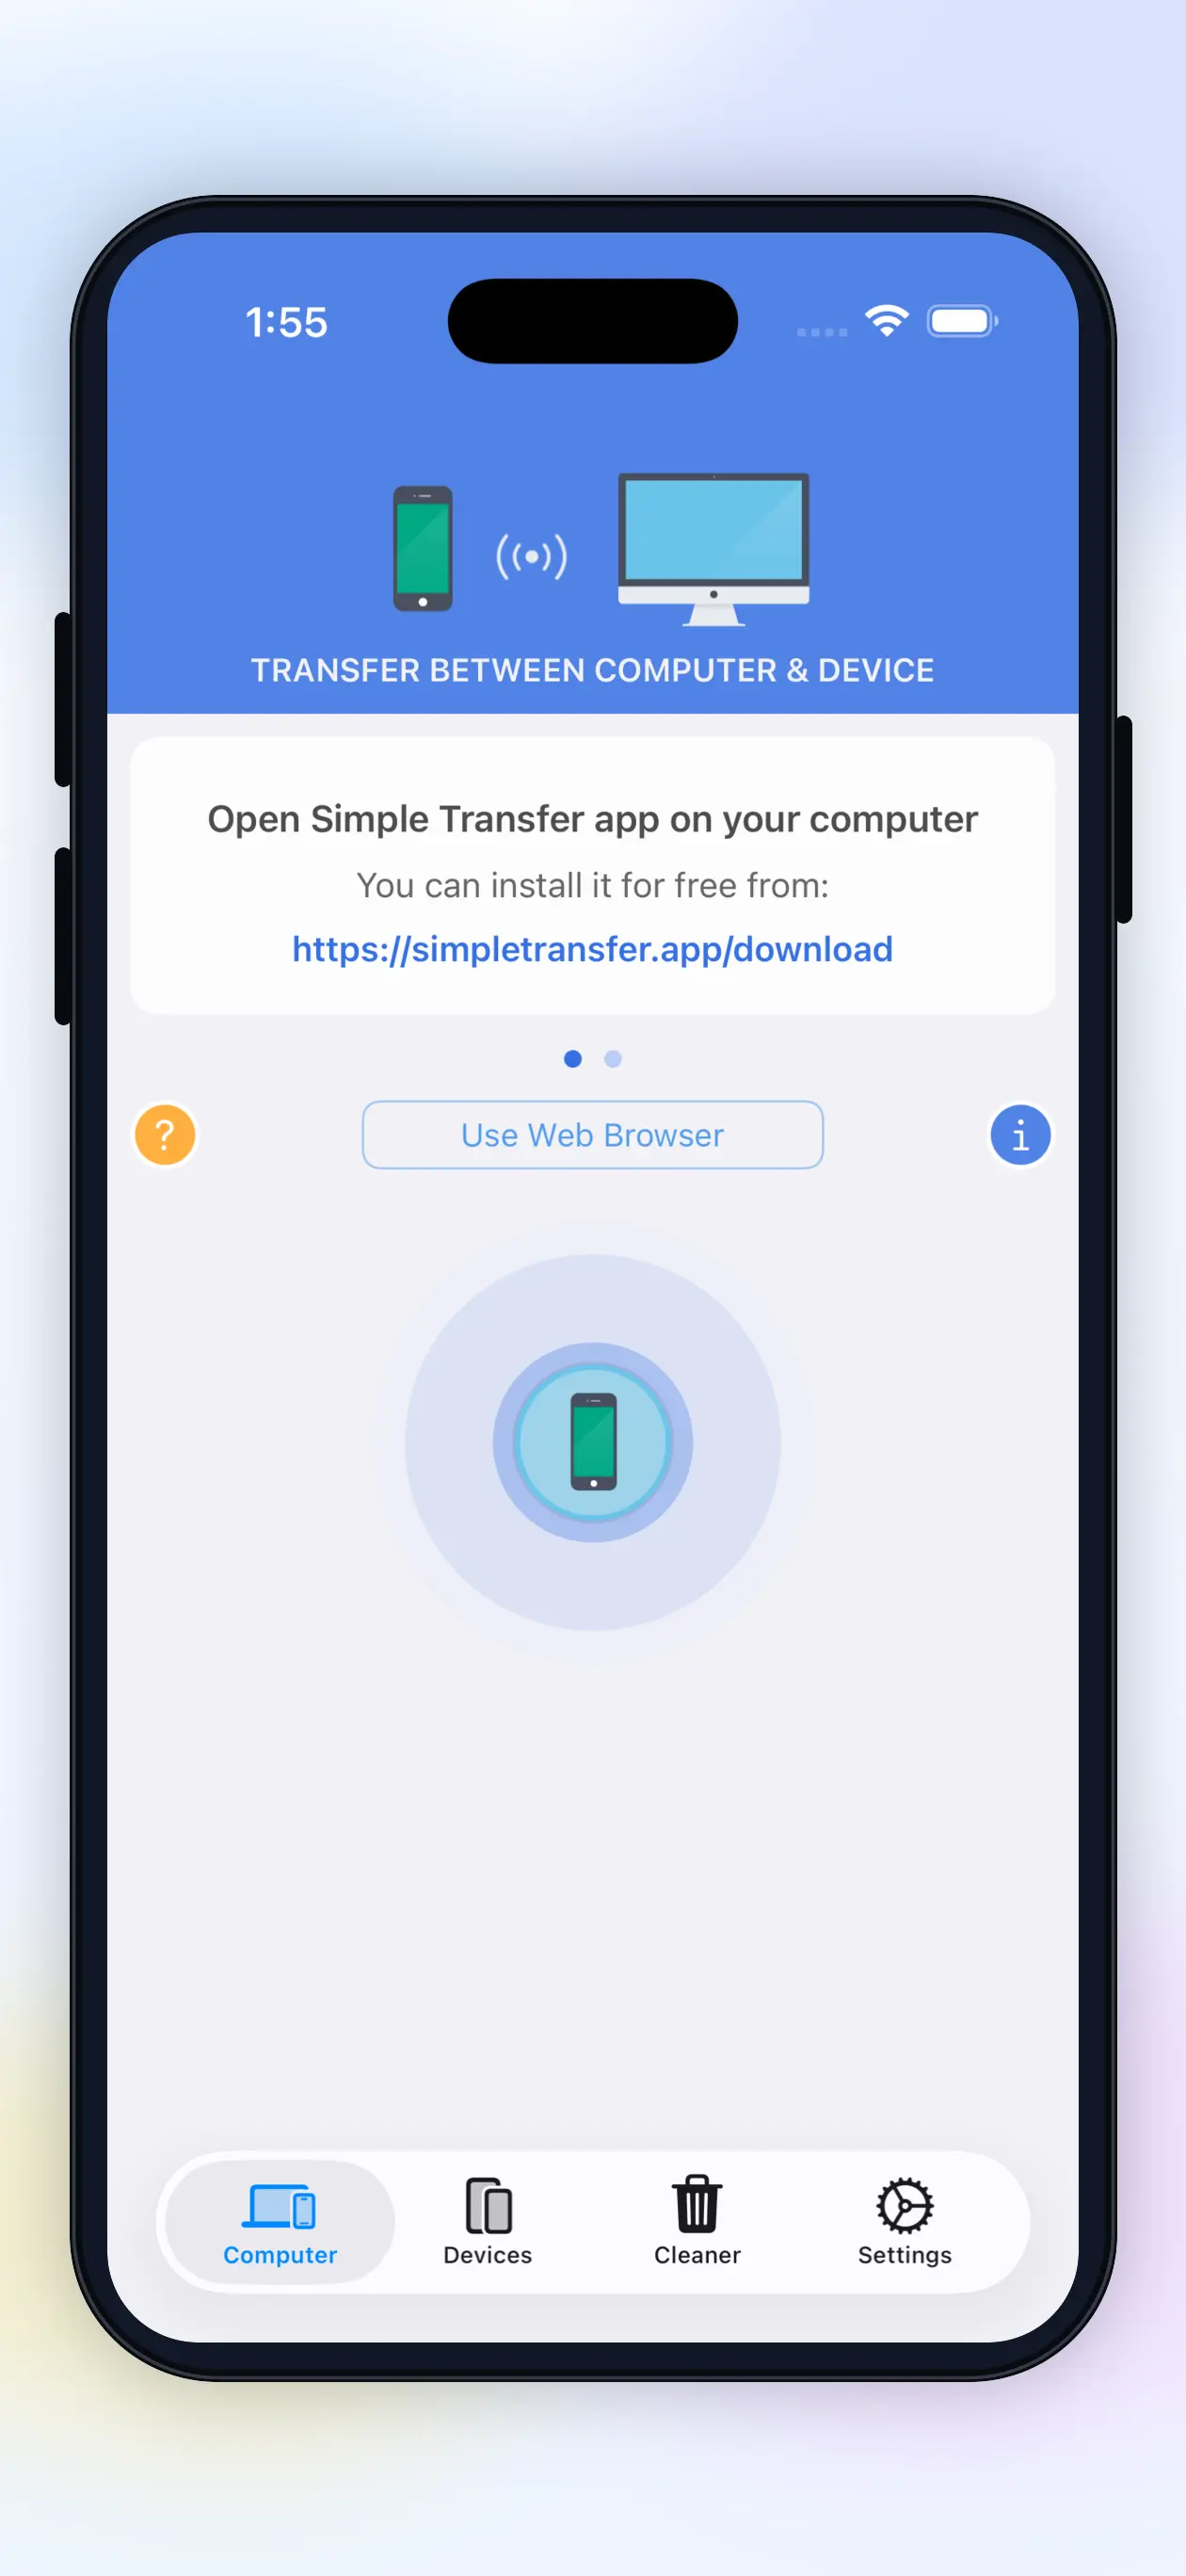
Open Simple Transfer on the iPhone or iPad and switch to the Computer tab.
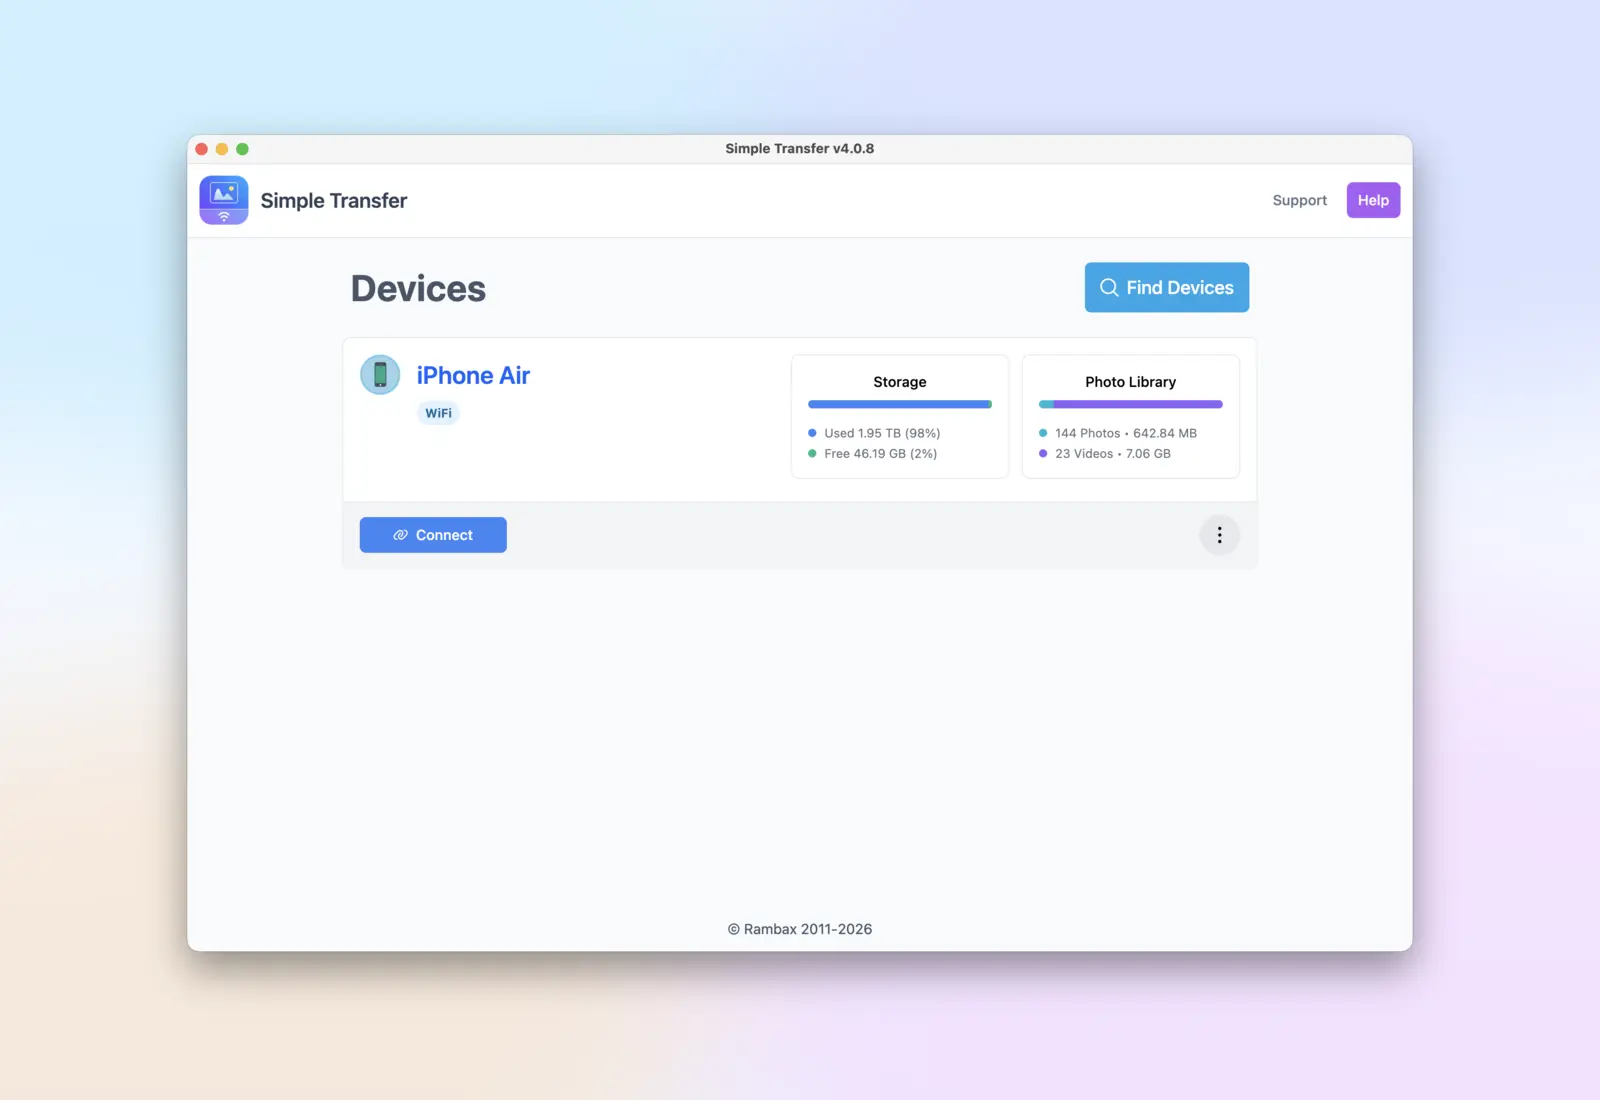
Install the free Simple Transfer Desktop app on Windows or Mac. Open it and your iPhone or iPad will appear in the device list as long as both are on the same WiFi network.
Pick files and download
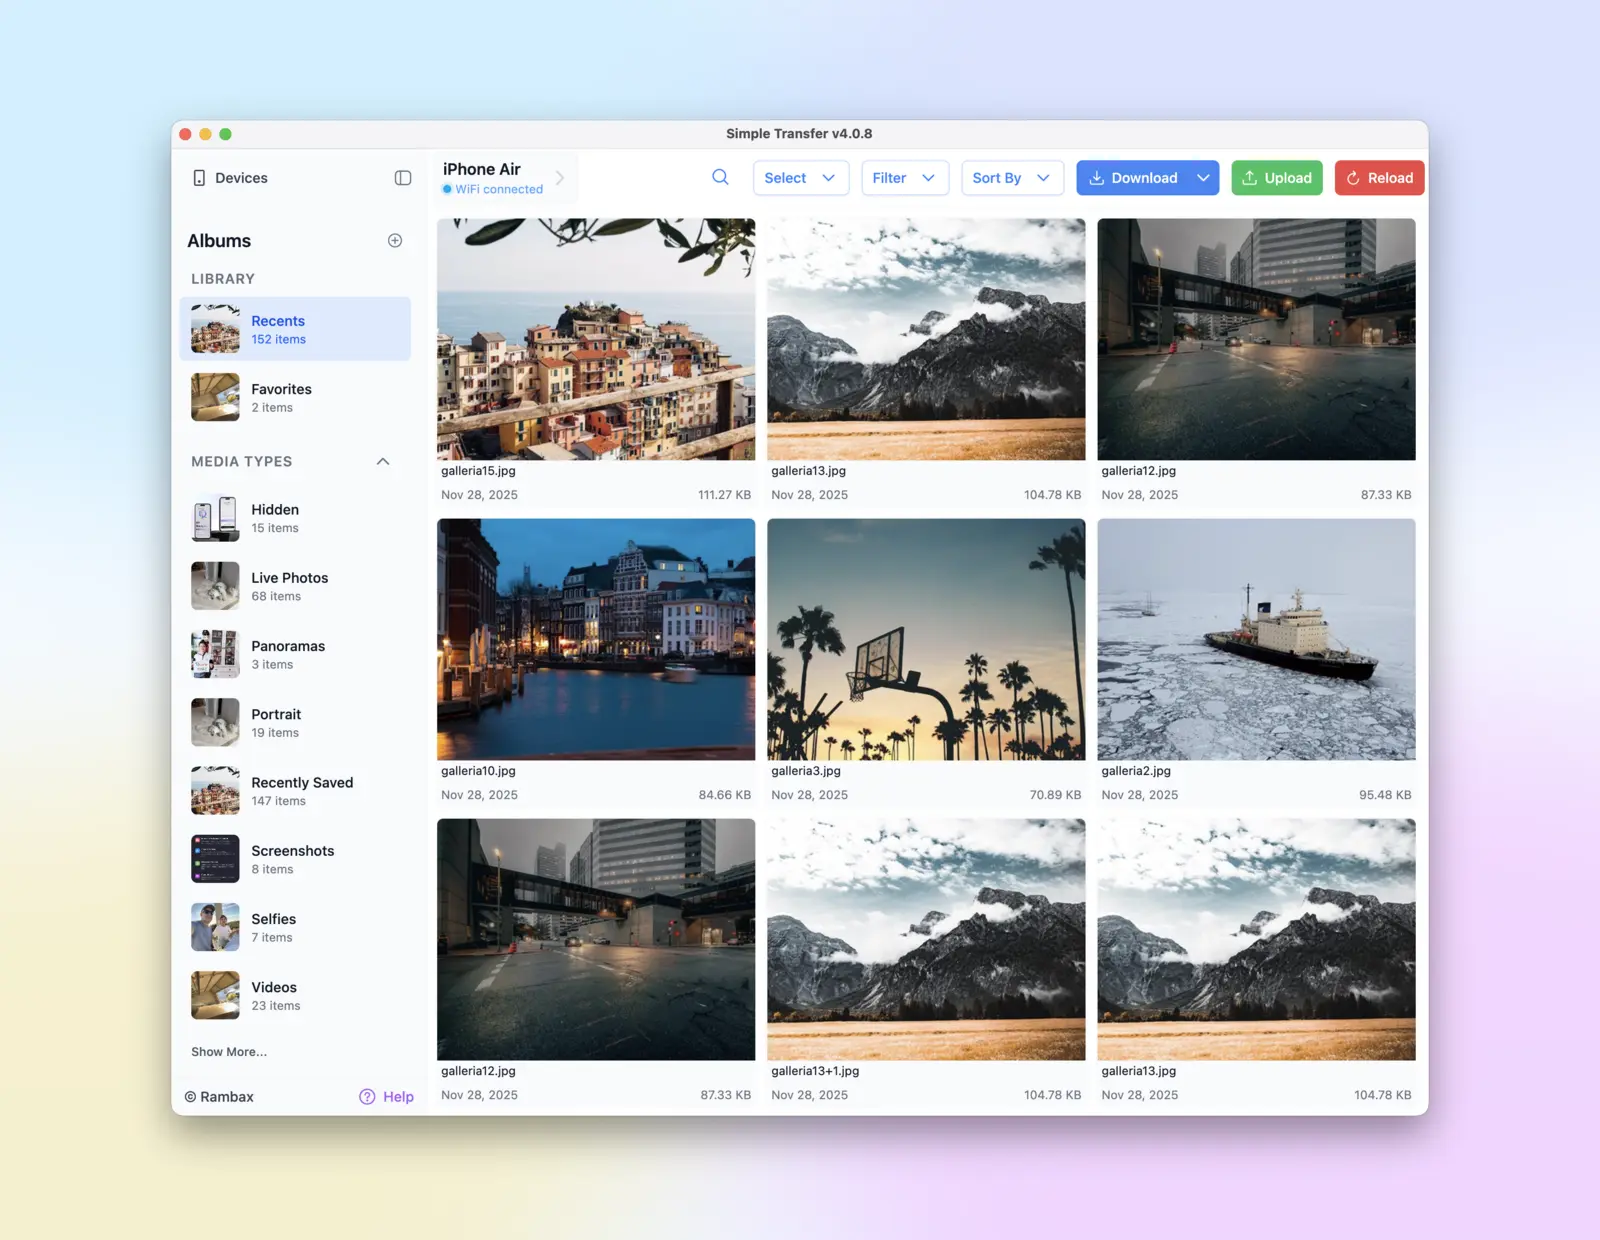
Click your device, open an album, select photos or videos, and click Download. For large libraries, choose your destination folder first. An external drive works well if you want files off the computer too.
For Windows-friendly files, choose JPG for photos and MP4 / H.264 for videos. To preserve maximum quality and metadata, keep the originals.
Tips that prevent most problems
Related guides
Install Desktop on Windows
Install the free companion app via the Microsoft Store and fix common setup problems.

iPhone photos to PC
Move photos and videos to a Windows PC or Mac without cloud upload.
Can't find iPhone or iPad
Fix device discovery, Local Network permission, VPN, firewall, and router issues.
Transfer with USB cable
Use a cable when WiFi is blocked, slow, or unreliable.